{{ page }}让我的问题处理变得简单了
选择标签:
{{ item.name }}
更多意见:
手机号码:
愿意接受深信服电话回访,以便更及时地处理您反馈的意见
提交建议
{{ tipmsg }}
{{ page }}反馈
在线客服
售后智能客服
售后技术问题诊断,7*24小时在线
售前在线咨询
专属商务经理在线服务
{{ page }}让我的问题处理变得简单了
关闭
提交成功!感谢您的反馈~
{{ page }}反馈
温馨提示:如您有技术问题请咨询
在线客服
{{ page }}让我的问题处理变得简单了
选择标签:
{{ item.name }}
更多意见:
手机号码:
愿意接受深信服电话回访,以便更及时地处理您反馈的意见
提交建议
{{ page }}反馈
{{ page }}反馈
温馨提示:如您有技术问题请咨询
在线客服
{{ page }}让我的问题处理变得简单了
选择标签:
{{ item.name }}
更多意见:
标记内容:
{{ dialog_sign_txt }}
手机号码:
愿意接受深信服电话回访,以便更及时地处理您反馈的意见
提交建议
# 热门搜索 #
暂无搜索记录
{{ item }}
# 搜索记录 #
全部删除
完成
暂无搜索历史
{{ item }}
{{getProductJoinVersion(item.product,item.version)}}
查看更多
登录
我的Sangfor
{{user.username}}
UID:{{user.uid}}
账号信息
您可认证深信服产品客户/深信服合作伙伴来提升全站访问权限
前往认证
我绑定的产品
我关注的产品
我的收藏
未读消息
{{unreadMsg}}
退出登录
搜索
{{getProductJoinVersion(item.product,item.version)}}
查看更多
{{item.name}}
{{subitem.name}}
{{msg}}
我感兴趣的产品线
{{item.name}}
您还没有关注任何产品线,
点击关注
所有产品与服务
未找到与“
{{searchName}}
”相关的产品线,请重新输入
{{item.name}}
{{subitem.name}}
暂无内容
热门产品线
{{item.name}}
暂无内容
安全产品
{{item.name}}
{{item.name}}
{{subitem.name}}
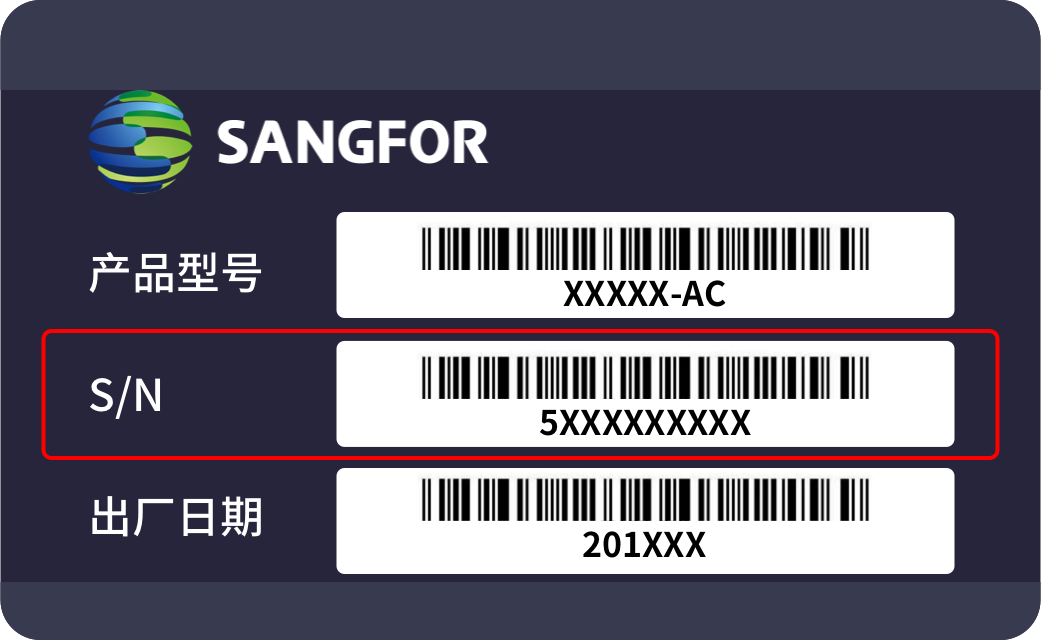
产品设备的SN码哪里查看?
产品设备的网关序号/ID哪里查看?
请联系
智能客服
获取产品版本信息
关注后若本产品有新的有价值的内容(含工具等)更新时,平台会每日推送至您的邮箱
设置邮箱
温馨提示:每个邮箱每天有
3
次获取验证码的机会,请谨慎输入
点击获取
{{ timerSecond }}s 后获取
1、若是网络信号问题请联网后尝试重新获取;
2、检查信息是否被系统拦截至垃圾邮箱,或者更换其他邮箱后重新获取;
3、联系我们请拨打服务电话:0755-86725929。
验证码已发送到您的邮箱,10分钟内有效,请勿泄露给他人
确 定
取 消
本页目录
如果未能解决您的问题,您可以使用
在线客服
寻求帮助
此内容仅开放给{{powertip}}
,请您先认证身份
认证为深信服客户
认证为深信服合作伙伴
认证为深信服员工
前往认证
在线客服
{{authTips}}
{{authTips}}
点击了解身份和权限说明
{{showPowerText}}权限:{{getPowerName}}
下载pdf
下载
分享本内容
微博
QQ
QQ 空间
链接复制成功
复制链接
分享
{{isCurCollection?'取消收藏':'收藏本内容'}}
{{isCurCollection ? '取消收藏' : '收藏'}}
建议使用Chrome浏览器访问!
深信服自助服务平台
首页
帮助文档
软件下载
按产品找软件
故障案例
工具专区
按场景找工具
工具全景图
服务支持
兼容性查询
在线实验平台
服务信息查询
产品安全中心
订单验收材料下载
安全态势感知管理平台SIP/探针STA
深信服安全感知平台(简称SIP)是一款面向全行业的大数据安全分析平台,旨在为用户构建一套集检测、可视、响应于一体的本地安全大脑,让安全可感知、易运营,更有价值。
文档
故障处理
软件
工具
论坛
搜本产品
点击可切换产品版本
知道了
不再提醒
SIP3.0.73
{{item.code}}
最新动态
版本发布动态
补丁发布动态
安全态势感知管理平台SIP/探针STA
文档
配置联调
典型场景案例集
内网DNS服务器场景
{{sendMatomoQuery("安全态势感知管理平台SIP/探针STA","内网DNS服务器场景")}}
内网DNS服务器场景
更新时间:


 建议使用Chrome浏览器访问!
